Making CISCO PIX/ASA Transparent DHCP through to work.

Hi! Again.
Last month I purchased one of those CCNA lab kits found on eBay at very low prices. Although the hardware is absolutely at end-of-sale / support from CISCO, it is very very cheap, and bring us the opportunity to go beyond Packet Tracer, get the screwdriver, and really put hand on true hardware!
As part of the kit, I got a PIX 515e firewall appliance. To my surprise, it was very easy to upgrade it to ASA 8.0.4(28) so I got my chances to play with it a little bit.
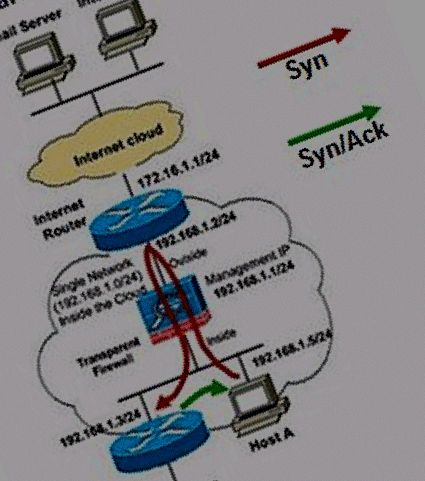
The PIX/ASA can, from 7.X firms, run in a "transparent mode". This looked to me very interesting since, at the end, in its default routed mode, playing with NAT,PAT and ACLs are very much the same we do with a modern router.
There are clear guides and configs around on how to set up the PIX/ASA in transparent mode... for instance take a look here.
There are but a hole on all info I looked around, and I found old forum posts around it without clear answer: How to allow DHCP negotiation through the firewall?
In documents, you'll read the following: DHCP relay is not required because you can allow DHCP traffic to pass through with an extended access list. OK, but... How to do it?
It took me a whole evening of googling, try and error until I figured it out (At the end, what I needed is to understand what is going on on the PIX and how it all works about transparent, packet inspection, and ACLs)... here we go:
For the impatient
Here are the excerpt in my startup config that do the trick, just apply them from Config mode and you're done:
access-list OUTSIDE_ACL extended permit udp host <your.dhcp.server.ip> host 255.255.255.255 eq bootpc
access-list INSIDE_ACL extended permit ip any any
access-group outside in interface OUTSIDE_IF
access-group inside in interface INSIDE_IF
Note here that you should replace ACL names to something clearer or nicer, than those, and also note that here you have to replace XXXXXX_IF with propper interface names (inside and outside interfaces).
The solution explained
If you follow the CISCO docs to set up your PIX/ASA in transparent mode, you'll note it does work by default, allowing you to surf the web, and protecting you from incoming connections (outside to inside) but allowing return/reply traffic outside to inside WITHOUT any ACL... what is happening?
Well, if you look at your config, pay attention to the end of it:
....
policy-map global_policy
 class inspection_default
  inspect dns preset_dns_map
  inspect ftp
  inspect h323 h225
  inspect h323 ras
  inspect rsh
  inspect rtsp
  inspect esmtp
  inspect sqlnet
  inspect skinny
  inspect sunrpc
  inspect xdmcp
  inspect sip
  inspect netbios
  inspect tftp
....
Basically the ASA/PIX is examining inside to outside traffic as it goes through it, from interface to interface, inspecting new connections established from inside and getting ready to allow related returning traffic to pass through.
Certain , more "special" traffic is carefully inspected because of its nature, that it goes beyond the classic TCP connection routine: for instead, a passive ftp connection.
If you try to ping an Internet host with default configuration you'll note it does not work, Although you can surf the web... But if you add icmp to the inspection list like this:
....
policy-map global_policy
 class inspection_default
  inspect dns preset_dns_map
  inspect ftp
  inspect h323 h225
  inspect h323 ras
  inspect rsh
  inspect rtsp
  inspect esmtp
  inspect sqlnet
  inspect skinny
  inspect sunrpc
  inspect xdmcp
  inspect sip
  inspect netbios
  inspect tftp
  inspect icmp
....
Then you'll see ping works!!!
So... why CISCO guys didn't just allo us to add dhcp to that list?... well, It would have been great, but I guess the problem inspecting DHCP handshakes is that, at its early stage, the client has no IP (it is trying to get one!), and the handshake is completed by a combination of layer2 communication and the usage of 0.0.0.0 and 255.255.255.255 layer3 addresses.
I guess that allowing someone's traffic from the outside to inside just for the fact the traffic has a broadcast destination address isn't much secure!
So, we have to play with ACLs!
ACLs into the mess...
ACLs are Access Control Lists so, always remember, they are a full list, that can have many lines, and that they work under several classic firewall principles: Up to down / first to last, First match wins and finally and most important Deny by Default.
What does this means?
Well, very simple: almost noting in our "most secure" outside interface (security 100) since it is blocking everything not strictly related to a previous inside to outside initiated connection...
But drastically changes our "less secure" inside interface (security 0), from an allow everything policy to a deny all policy.
When I applied solutions found around to my PIX firewall to let DHCP go through, I loss connectivity as soon as I applied an ACL to the inside interface... That's logic, since at that point I was dropping everything but DHCP!!!
So, you have basically two options:
-
First, Explicitly state what traffic can go in to out and vice-versa, playing with two ACLs, which is very secure but also very tedious.
-
Second, Forget about two ACLs, especially the one at the inside (inside to outside), but let Everything inside to outside go through (as initially set by the firewall but this time including any kind of ip traffic in to out) using a simple "allow-all" ACL, and just manage your defense at the outside ACL, punching holes as necessary to let outside initiated connections go out to in as required.
I choosed (like many people around) the second way, so, I created the following ACL (named "inside") and applied it to the inside interface (named also "inside" in my setup).
access-list inside extended permit ip any any
access-group inside in interface inside
That way, any kind of IP traffic is allowed independently to the fact that the firewall will be inspect it in order to allow returning traffic out to in (otherwise it is dropped, cool!).
Then we need to open our first "hole" in our firewall: I will allow my modem with IP 192.168.1.1 replying DHCP discover traffic by initiating DHCP offer traffic outside to inside (that is, a broadcast 255.255.255.255 originated at port 67).
NOTE: CISCO ASA/PIX replaces automatically ports 67 and 68 by its aliases "bootpc" and "bootps" even if you type 67 or 68... that's why I use them here.
access-list outside extended permit udp host 192.168.1.1 host 255.255.255.255 eq bootpc
access-group outside in interface outside
As before, note my outside interface is typically named "outside" and the ACL applied to this interface is also named "outside"
Full startup-config sample
Just out of curiosity, and just in case it is usefull to someone, I paste here my final config for my ASA 8.0.4 PIX 515e setup with the following scenario:
- subnet is a typical 192.168.1.0/24
- modem IP is 192.168.1.1
- PIX IP is set at 192.168.1.254
- SNMP polling is enabled from server 192.168.1.2
- DNS name servers are 8.8.8.8 and 8.8.4.4
- NTP server IP is one of the "pool.ntp.org" cluster of NTP servers.
- Clock time and zone is set to Europe/Madrid with summer day tiem saving enabled
- HTTP ASDM is enabled from within the inside subnet.
- Telnet and SSH are enabled
- ICMP inspection is enabled
- DHCP through is enabled!!!
Here is the config:
PIX Version 8.04(28)
!
firewall transparent
hostname pixfirewall
domain-name example.com
enable password secret
passwd secret
names
!
interface Ethernet0
 nameif outside
 security-level 0
!
interface Ethernet1
 nameif inside
 security-level 100
!
boot system flash:/pix804-28.bin
ftp mode passive
clock timezone CET 1
clock summer-time CEST recurring last Sun Mar 2:00 last Sun Oct 3:00
dns domain-lookup outside
dns server-group DefaultDNS
 name-server 8.8.8.8
 name-server 8.8.4.4
 domain-name example.com
access-list outside extended permit udp host 192.168.1.1 host 255.255.255.255 eq bootpc
access-list inside extended permit ip any any
pager lines 24
mtu outside 1500
mtu inside 1500
ip address 192.168.1.254 255.255.255.0
icmp unreachable rate-limit 1 burst-size 1
no asdm history enable
arp timeout 14400
access-group outside in interface outside
access-group inside in interface inside
route outside 0.0.0.0 0.0.0.0 192.168.1.1 1
timeout xlate 3:00:00
timeout conn 1:00:00 half-closed 0:10:00 udp 0:02:00 icmp 0:00:02
timeout sunrpc 0:10:00 h323 0:05:00 h225 1:00:00 mgcp 0:05:00 mgcp-pat 0:05:00
timeout sip 0:30:00 sip_media 0:02:00 sip-invite 0:03:00 sip-disconnect     0:02:00
timeout sip-provisional-media 0:02:00 uauth 0:05:00 absolute
timeout tcp-proxy-reassembly 0:01:00
dynamic-access-policy-record DfltAccessPolicy
http server enable
http 192.168.1.0 255.255.255.0 inside
snmp-server host inside 192.168.1.2 poll community public
snmp-server location SomeWhere
snmp-server contact someone@example.com
snmp-server community public
snmp-server enable traps snmp authentication linkup linkdown coldstart
crypto ipsec security-association lifetime seconds 28800
crypto ipsec security-association lifetime kilobytes 4608000
telnet 192.168.1.0 255.255.255.0 inside
telnet timeout 5
ssh scopy enable
ssh 192.168.1.0 255.255.255.0 inside
ssh timeout 5
ssh version 2
console timeout 0
threat-detection basic-threat
threat-detection statistics access-list
no threat-detection statistics tcp-intercept
ntp server 5.56.160.3
!
class-map inspection_default
 match default-inspection-traffic
!
!
policy-map type inspect dns preset_dns_map
 parameters
  message-length maximum 512
policy-map global_policy
 class inspection_default
  inspect dns preset_dns_map
  inspect ftp
  inspect h323 h225
  inspect h323 ras
  inspect rsh
  inspect rtsp
  inspect esmtp
  inspect sqlnet
  inspect skinny
  inspect sunrpc
  inspect xdmcp
  inspect sip
  inspect netbios
  inspect tftp
  inspect icmp
!
service-policy global_policy global
prompt hostname context
Enjoy your Labs!!!